01 August 2011

Fashion Digest III


via Facehunter

She made the dress herself!! I love the color fade effect...


vai Hel Looks


via Sartorialist


via Atlantic-Pacific

31 July 2011

Into Another World

These set of paintings by J. Courlas do an excellent job of instilling a feeling of unease and isolation as well as depicting a fantastic world that may not be what it appears.  I really like the effect of the fuzzy coloring - kind of like colored pencils.


Courtesy of: But Does It Float

30 July 2011

Eggplant and Feta Bruschetta

I made these twice this week. Monday for the first time ever, and then again on Thursday because they were just THAT tasty.

Recipe below. Smitten Kitchen never fails to disappoint!


eggplant salad on toasts


Makes about 8 toasts; double the recipe if you’d like to eat the salad straight or use it in one of the ways suggested above.


1 medium eggplant, about 3/4 pound, cut into 1/2-inch cubes
2 tablespoons olive oil plus additional for oiling baking sheet
1/4 teaspoon salt
Black pepper
1 teaspoon red wine vinegar
1/4 cup crumbled crumbled feta
1 scallion, thinly sliced
8 1/2-inch slices of baguette, brushed with olive oil (I used 1-inch slices in the photos, then decided they were too thick)
1 small clove garlic, peeled and halved


Preheat oven to 425 degrees. Lightly oil a baking sheet or roasting pan. Toss eggplant, 2 tablespoons olive oil, salt and a generous amount of black pepper together in a medium bowl until evenly coated. Spread on prepared baking sheet and roast for about 25 minutes, moving pieces around occasional so they evenly brown. For a cold salad, let the eggplant cool a bit before mixing it with red wine vinegar, feta and scallion. For a warm salad where the feta glues itself to the eggplant a bit, toss the vinegar, feta and scallion together when the eggplant just comes out of the oven. You’ll want to eat the warm salad quickly.


Broil or toast baguette slices then rub them with a garlic clove before heaping on eggplant salad.

Cine Works

I've been meaning to post this for a long time now....just took a bit of a hiatus from blogging. Not that I was ever that good at it to begin with!

Lots of cool stuff that would have made it on the blog, sadly did not because honestly, I didn't do that great of a job jotting down everything over the last few months.  But below is something I did manage to remind myself to post.

Ever wonder how a cork is made? Well check out the illustrated guide below from Wine Anorak. It is absolutely fascinating!


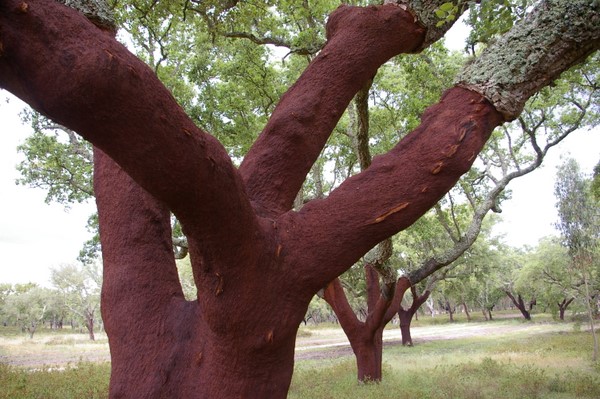
It all starts in the forest. Cork oaks are harvested every nine years, once they reach maturity. It doesn't harm the tree, and the cork bark regrows. Most cork forests are in Portugal and Spain.
The year of harvest is marked on the trunk, so each tree isn't harvested at the wrong time. Cork is a great insulating material, and gives these oaks a chance to survive the forest fires that occasionally happen in the hot Mediterranean summers.
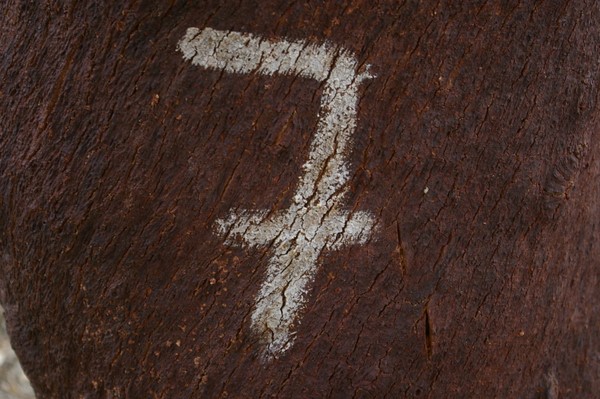
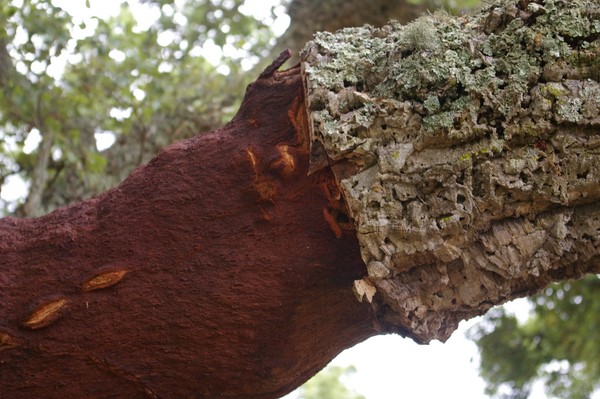
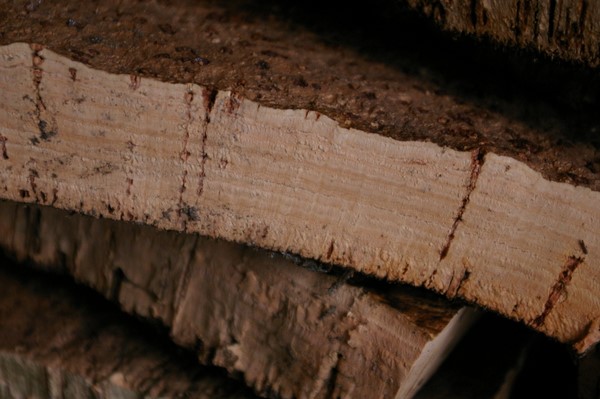
Here's a close-up of a tree that was harvested the year previously.
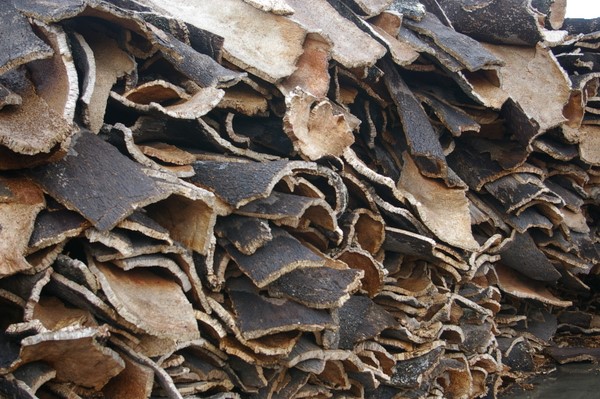
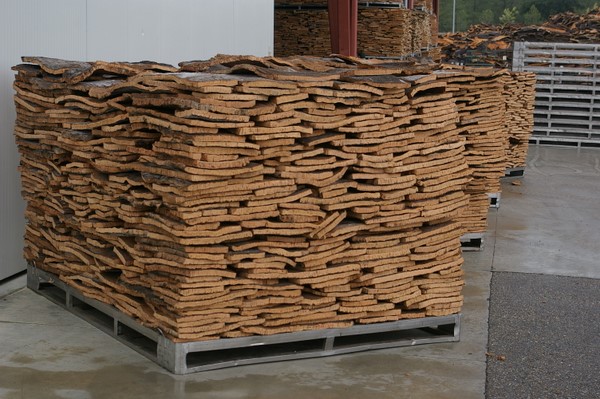
The harvested cork planks are stored before processing. Good cork companies will store them on concrete rather than bare earth, lowering the risk of contamination.
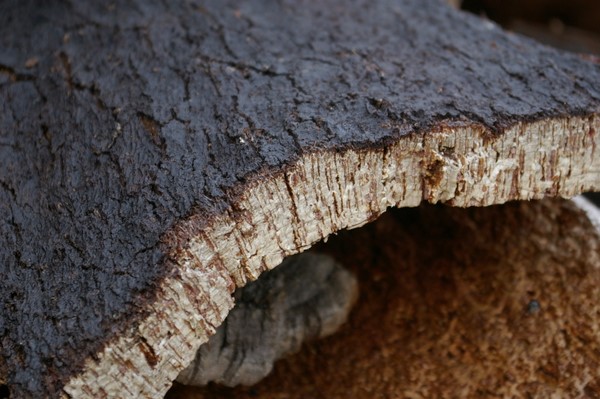
This is a close-up of a piece of bark. It's quite thin, and won't be used to produce high-quality natural cork. But now there are also technical corks, made up of small pieces of cork fused together, which means that more of the cork bark is suitable for producing wine bottle closures. 
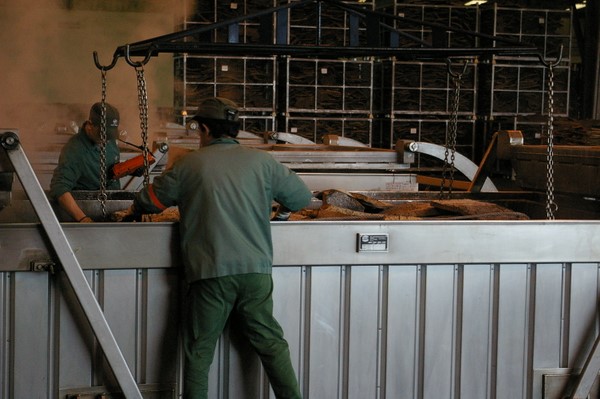
Before processing, the cork planks are put on pallets. Then they are ready for the first stage in the cork production process: boiling. The following pictures were taken at Amorim's facility in Coruche, ion the south of Portugal.
The planks are boiled to soften them, and also to clean them. In the bad old days these would be boiled in murky pits without the water being changed very often. Now, to avoid cross-contamination, the water is cleaned, filtered and replenished regularly, with volatiles being removed on a continuous basis.
This batch is just going in.
The boiled planks are flatter and easier to work with
This is a nice-looking piece of cork.
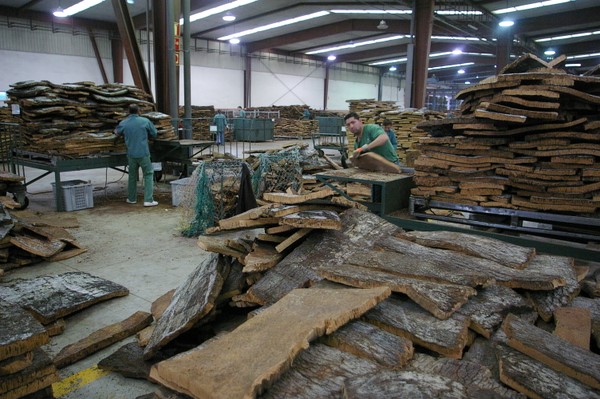
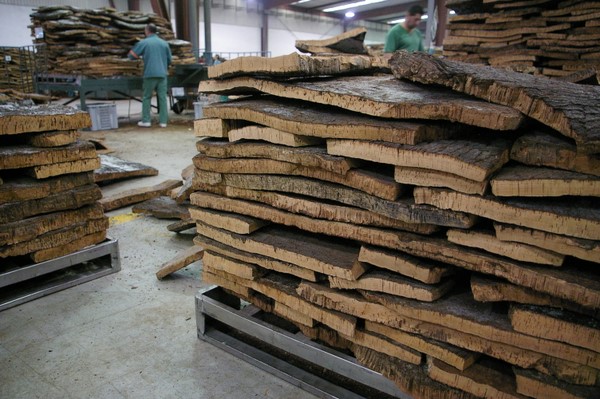
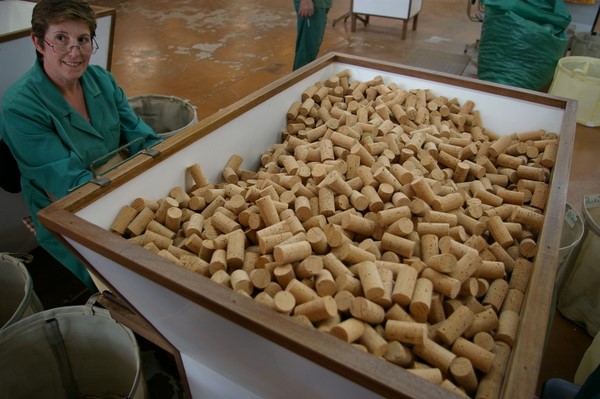
Next the planks are graded and cut into workable pieces.
Some will be used for punching natural corks out of; others will be used to make technical corks. The pictures below were all taken at Amorim's factory in the north of Portugal, south of Porto.
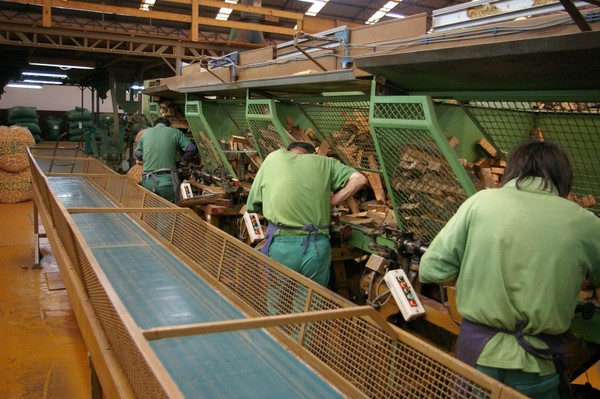
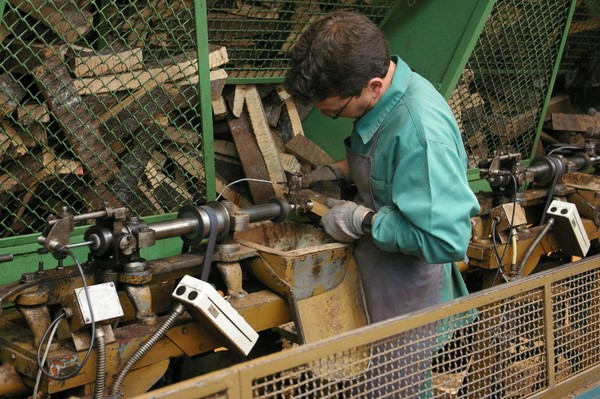
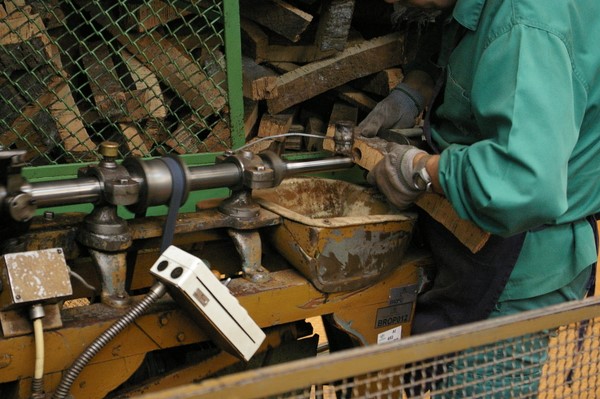
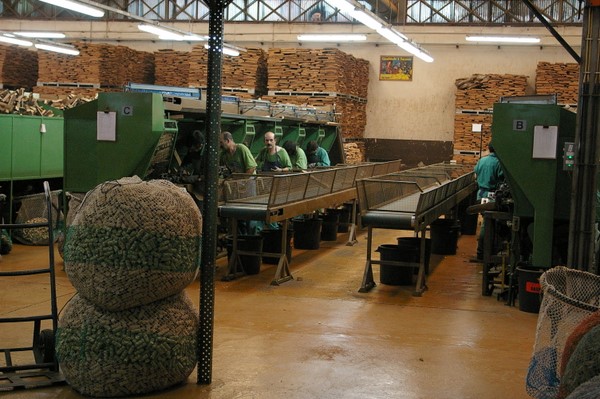
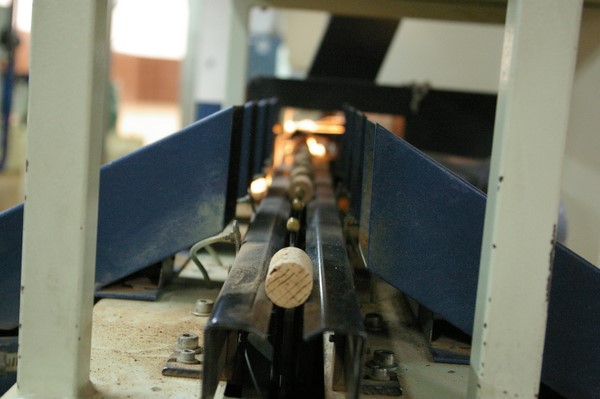
These workers are hand-punching corks from strips of bark: these will be high-end corks. Others are machine punched.
It is a skilled process: make the wrong decisions and the corks aren't good enough, or cork is wasted.
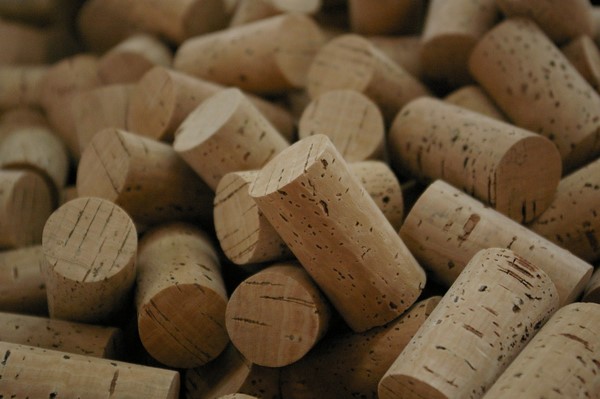
What remains after the corks have been punched. This remaining cork can be ground up to make granules that can then be glued together to make agglomerate cork.
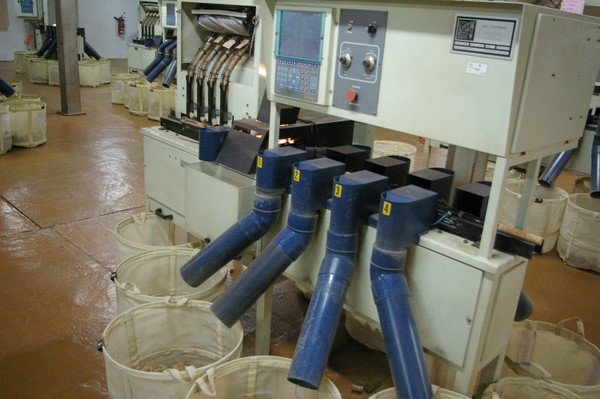
The corks are optically sorted: blasts of air are used to send the corks into the right grade bins.
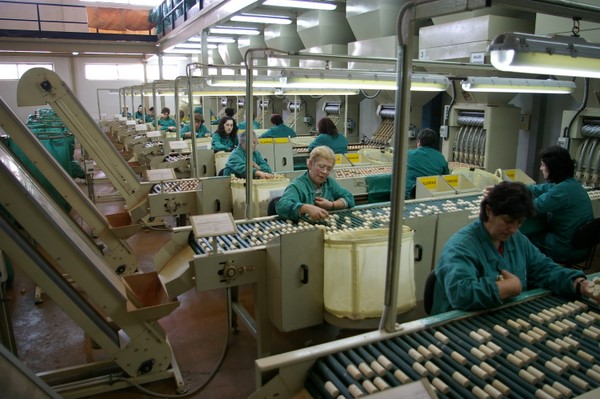
Then the corks are sorted by eye. 
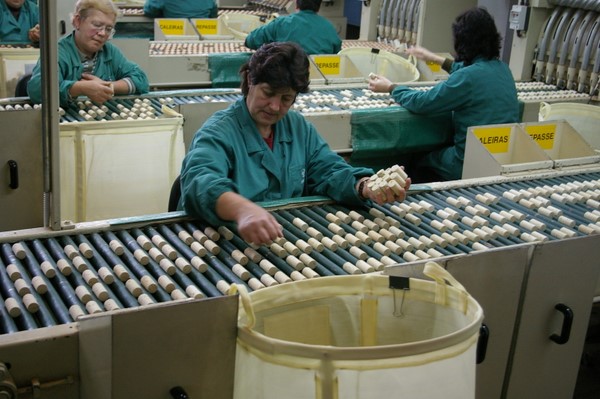
Great care is taken sorting the top grade corks.
These corks will be really expensive: over a Euro each.

For HTML, go to : Wine Anorak

Paint Splattered Foot Art

Jeffrey Campbell has brought us these amazing paint-splattered footwear.  Better get out my paints and start splattering them kicks!

Jeffrey Campbell grayson...


Jeffrey Campbell Paint Shoes

21 April 2011

S'mores Cookie Bars

Oh man....must...make....these.

Post image for S’more Cookie Bars


S’more Cookie Bars
Print this recipe
from Baking Bites
1/2 cup unsalted butter, room temperature
1/4 cup brown sugar
1/2 cup granulated sugar
1 large egg, room temperature
1 tsp vanilla extract
1 1/3 cups all-purpose flour
3/4 cup graham cracker crumbs (about 8 graham crackers)
1 teaspoon baking powder
1/4 teaspoon salt
2 king-sized milk chocolate bars
1 1/2 cups marshmallow Fluff (not melted marshmallows because they harden when they cool)
1. Preheat oven to 350 degrees F. Grease and/or line an 8-inch square baking pan.
2. In a large bowl, cream together butter and sugar until light. Beat in egg and vanilla.
3. In a small bowl, whisk together flour, graham cracker crumbs, baking powder and salt. Add to butter mixture and mix at a low speed until combined. Divide dough in half and press half of dough into an even layer on the bottom of the prepared pan. Don’t worry if it seems thin; the baking powder will allow it to rise.
4. Place chocolate bars over dough (don’t layer the bars, just break them to fit if you need to), then spread the marshmallow Fluff over the chocolate bars. Finally, top the Fluff with the remaining dough by forming the dough into sheets with the palm of your hands and laying it down (as shown above). Don’t worry if the dough isn’t covering everything! It’ll spread out as it bakes.
5. Bake for 30 to 35 minutes, until lightly browned. If the top is browning too quickly, you can always cover it with tin foil for the remaining baking time. Cool completely before cutting into bars. If you don’t allow them to cool completely, they will crumble when you try to cut them. Makes 16-20 bars.
Courtesy of Crepes of Wrath

13 April 2011

Fashion Digest II


Need. Short Overalls. Ultimate Nostalgia.


All via Facehunter

OCD

This is too beautiful/cool not to post.  I meant to do it over a week ago! Sorry for the delay friends. Below are a series of Il Lee drawings.  All done with a mere ballpoint pen.  I'm obssessed.


More images here